CallerID Filtering/Blocking/Blacklisting is a tool that lets you block DIDs according to the incoming CallerID number. You can apply this to some or all of your DID(s) numbers. You can blacklist/block as many as you want.
Some usage scenarios
- An annoying telemarketing firm has been calling your number. You can block that specific number by entering it into the Block CallerID field and never hear from that number again.
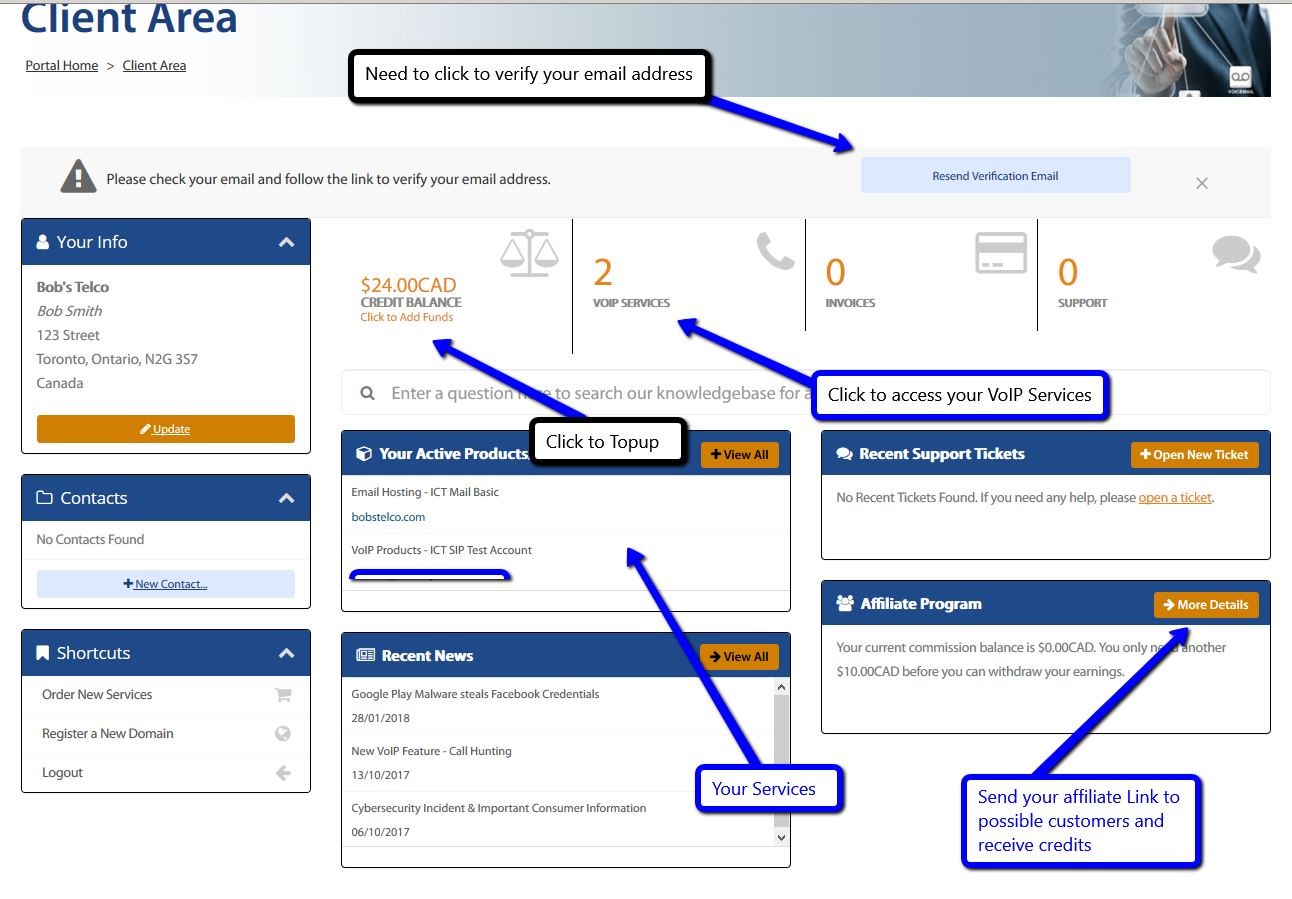
To access the CallerID Block Panel click on your VoIP Services box in your Client Area Home. Be sure to take note that you have verified your email address if you see
"Please check your email and follow the link to verify your email address" warning. Click on the button "Resend Verification Email".
If Mobile Client Access please scroll to the bottom of this tutorial for views.
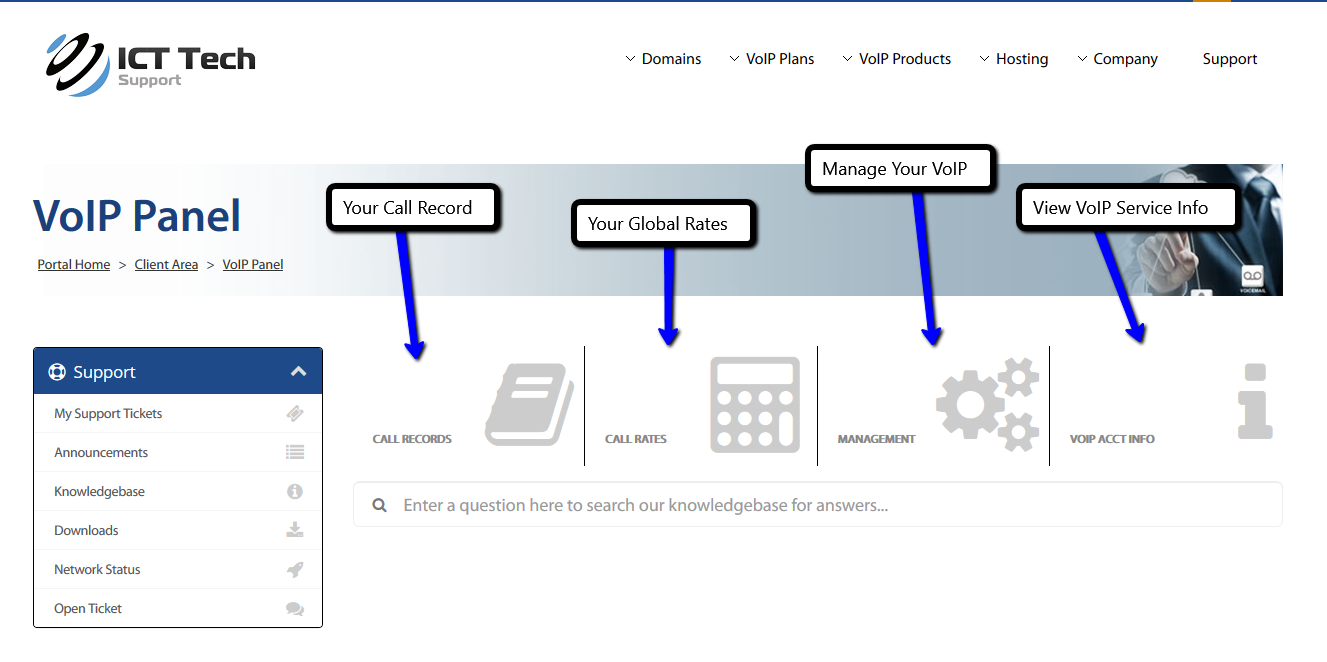
When you are located within the VoIP Panel you can then select and click on the Manage box.
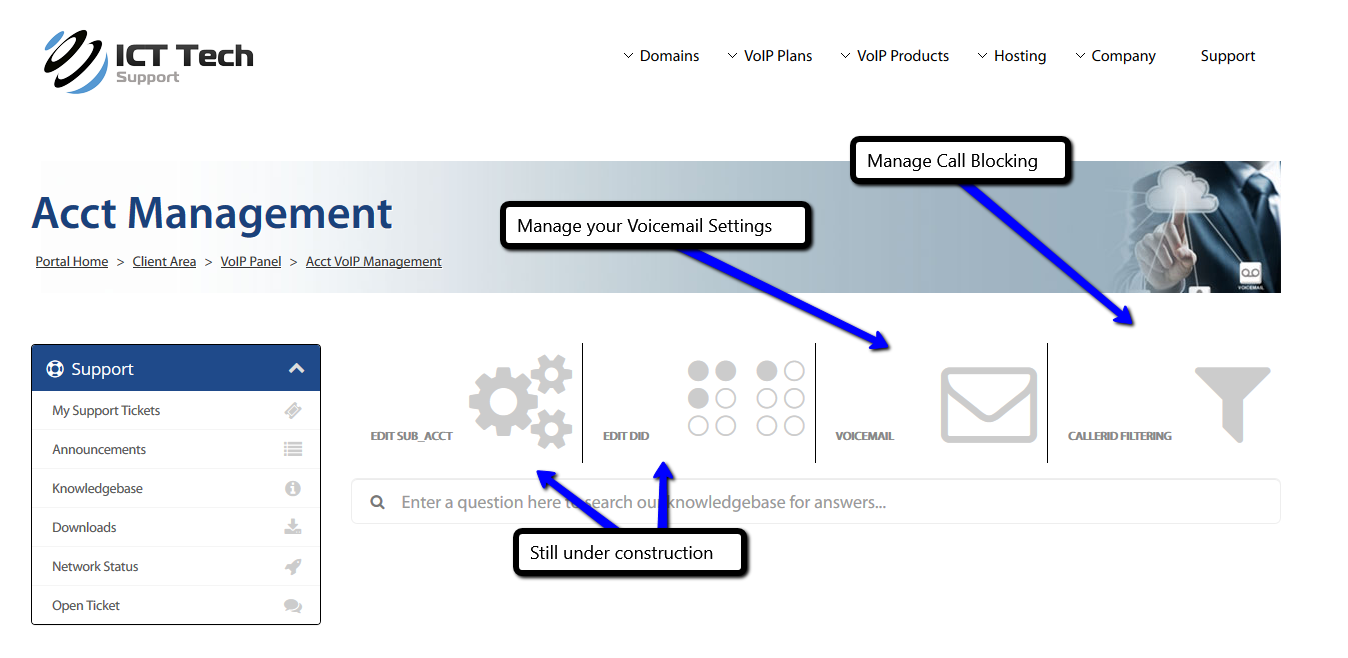
Once you are located within the VoIP Management Panel then select the CallerID Filtering box.
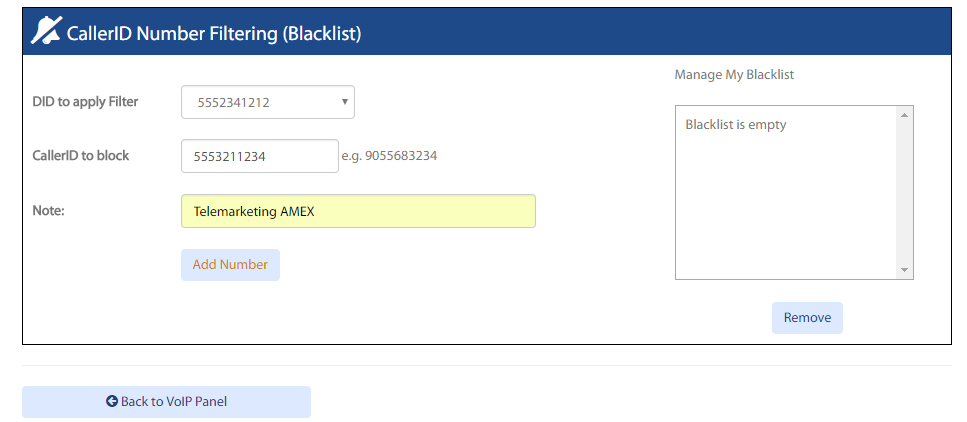
Your CallerID Number Filtering (Blacklist) Panel now displays the following. From here you can select your DID from the drop down to apply the block on then enter the CallerID number (DID) to block in the field. Next place a note why this is being blocked (i.e. "Telemarketing"). Click on the "Add Number" button and the DID you are now inbound blocking will display within your "Manage My Blacklist" table. From the table you can select a DID at any time and click the "Remove" button to allow the caller to make calls to your DID.
The Mobile View Interface
To access the CallerID Block Panel click on the VoIP Services box in your Client Area Home.
Be sure to take note that you have verified your email address if you see
"Please check your email and follow the link to verify your email address" warning.
Click on the button "Resend Verification Email".

Within the VoIP Panel you can then select and click on the Manage box.

Within the VoIP Acct Management Panel then select the Caller Block box.

Your CallerID Filtering Panel now displays the following. From here you can select your DID from the drop down to apply the block on then enter the CallerID number (DID) to block in the field. Next place a note why this is being blocked (i.e. "Telemarketing"). Click on the "Add Number" button and the DID you are now inbound blocking will display within your "Manage My Blacklist" table. From the table you can select a DID at any time and click the "Remove" button to allow the caller to make calls to your DID.

If you have any questions about this new service feel free to email support@icttech.ca or give us a ring at +1.888.416.3054

